

Visible mending with sashiko: plan and stitch a first patch
For a first repair, choose a small worn area on stable woven cloth. The patch supplies sound material under or over the damage; the stitches connect it to sound cloth around that area. A decorative line crossing a hole cannot replace the missing fabric on its own.
In this article
What you need
- The clean garment or cloth and a compatible patch offcut
- Sashiko thread and a needle that can pass through the full layer stack
- Scissors, temporary basting thread and a tested marking method
- The care instructions for the garment and patch material
Map the damage before sizing the patch
Look beyond the visible opening. Hold the area to the light and compare it with nearby sound fabric; thinning may extend farther than the hole. Choose a patch that reaches beyond that weakened area so the outer stitches have something sound to grip.
Avoid a heavily loaded seam, fragile fabric that is failing widely, or stretch fabric for this first exercise. Those repairs require decisions that a simple woven-cloth patch does not teach.
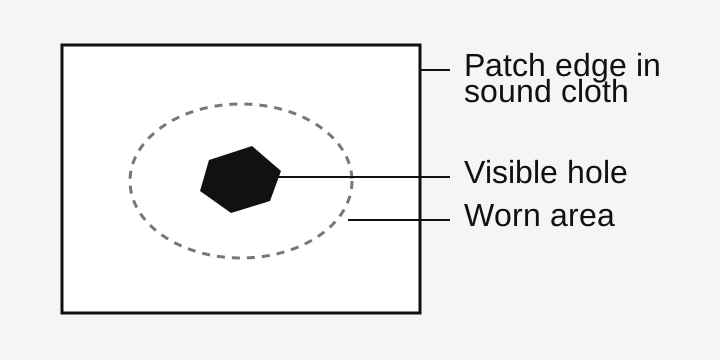
Hold the layers without changing the garment’s shape
Position the patch and smooth the garment in its normal shape. Baste temporarily so the patch cannot slide while you add the visible stitching. Plan how exposed patch edges will be secured; sashiko rows through the middle do not automatically finish an edge.
Separate a pocket bag or the opposite side of a sleeve before every needle pass. Being able to see where the needle will come out matters more than finishing the row quickly.
Sources: Atsushi Futatsuya: sashiko mending approaches and preparation
Stitch a simple field across the patch
Try the full stack first
Make a few stitches at the patch edge. If the needle needs excessive force, change the material pairing or reduce the stitches gathered on it.
Sew through both layers
Work parallel running-stitch rows through garment and patch, reaching sound cloth around the wear. Use a simple route you can inspect on the reverse.
Smooth each row
Settle the thread along the stitched line and keep the garment relaxed. Do not pull a tight line across a hole or wrinkle to force it shut.
Check and finish the perimeter
Secure any edge that could lift or fray according to the patch construction, then remove basting that is no longer needed.
Sources: Atsushi Futatsuya: sashiko mending approaches and preparation
Test the repaired area in use
Flex the area gently, turn the garment over and check the pocket or sleeve still opens. Look for a loose loop that could snag, an unsecured patch edge or an outer row sitting in cloth that is still too weak. Inspect again after the first permitted wash.
Visible mending is a contemporary description of making a repair visible. Boro has a particular Japanese textile history; the V&A’s collection and Susan Briscoe project offer useful context. A newly stitched patch does not need an invented antique story to be worthwhile.
Sources: V&A: Japanese boro textiles and Susan Briscoe’s bag project